Showing posts with label Organizing. Show all posts

Wednesday, November 4, 2015

Project Life Cards - Organization PART 2

Hello all!
As I said in PART 1 of the organization posts, I have had a really hard time trying to find which cards would work in my page layouts.  I previously had the cards sorted and stored in Medium CTMH Organizers by kit.  Both 4x6 cards and 3x4 cards were stored together.  

It just wasn't working for me.

If you ever feel like something isn't working for you in your creative space, you change it right?  Well, I decided to take matters into my own hands and change the way I had the cards. 

I have found that I use the 3x4 cards a little more than I use the 4x6 cards.  


I decided to organize my cards alphabetically by kit and then by size.  The first CTMH box was used solely for 4x6 cards - alphabetically by kit name.
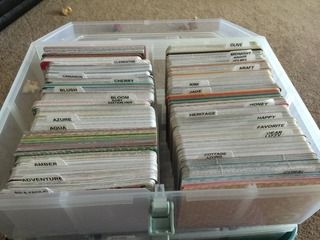

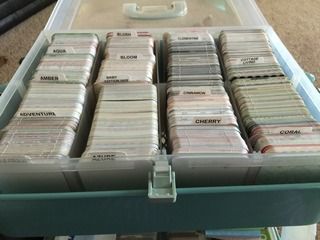
Half of the second CTMH box was used for the rest of the 4x6 cards I had.  

The other half of the CTMH box, I started over with the 3x4 cards.  Again, I organized the cards alphabetically by kit name.  


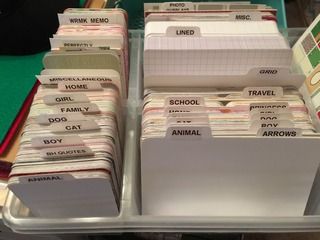
Now, I also have some themed cards from Hobby Lobby that really didn't fit into a kit but are used throughout my albums for specific trips, school functions, birthdays, etc.  I have an Antonius plastic organizer from IKEA that I used just for these kinds of cards.  It is arranged alphabetically and sorted by size as well.  I have even stored the grid and lined 3x4 and 4x6 cards in the Antonius organizer. 


I guess I will see how it all works when I get my daughter's scrapbook out and try to get some layouts done!  Wish me luck!

Until Next time,
SCRAP ON!
~Cyn~

Tuesday, November 3, 2015

Project Life Cards - Organization PART 1

I have been a busy chick lately and haven't been writing at all.

I have tried to get to work on some albums but have found that the way I am set up, I really can't find the ones I want to use quickly.  It was taking forever to find just the right card to use in my daughter's album.

A friend of mine told me about this website from a fantastic woman who has been keeping up with the PDF's of each of the kits that Becky Higgins has released in her Project Life line and has been updating it with each release!

So, I saved and printed each of the PDF Files and created a project Life Binder.


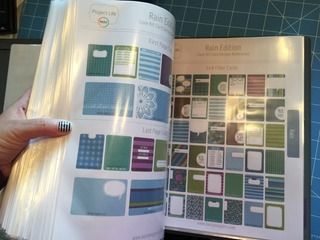
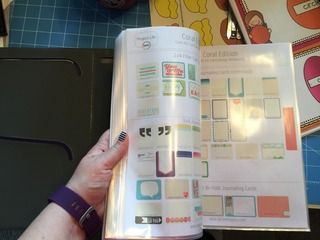
The PDF's have a picture of each of the cards that come in each kit and there is also a checklist so that you can keep track of the kits that you have.  For those of you who have a dozen or less kits, it is easy to keep track.  But for those of us who have a dozen or more to pull from, this checklist is PHENOMENAL!!!!


I used page protectors and sorted the kits alphabetically.  Now, when I work on albums, I can just flip through the book and find the proper card to suit the layout.


Pretty awesome, eh?

Until Next Time...
SCRAP ON!
~Cyn~

Saturday, January 11, 2014

Organization: The Scrap Haven

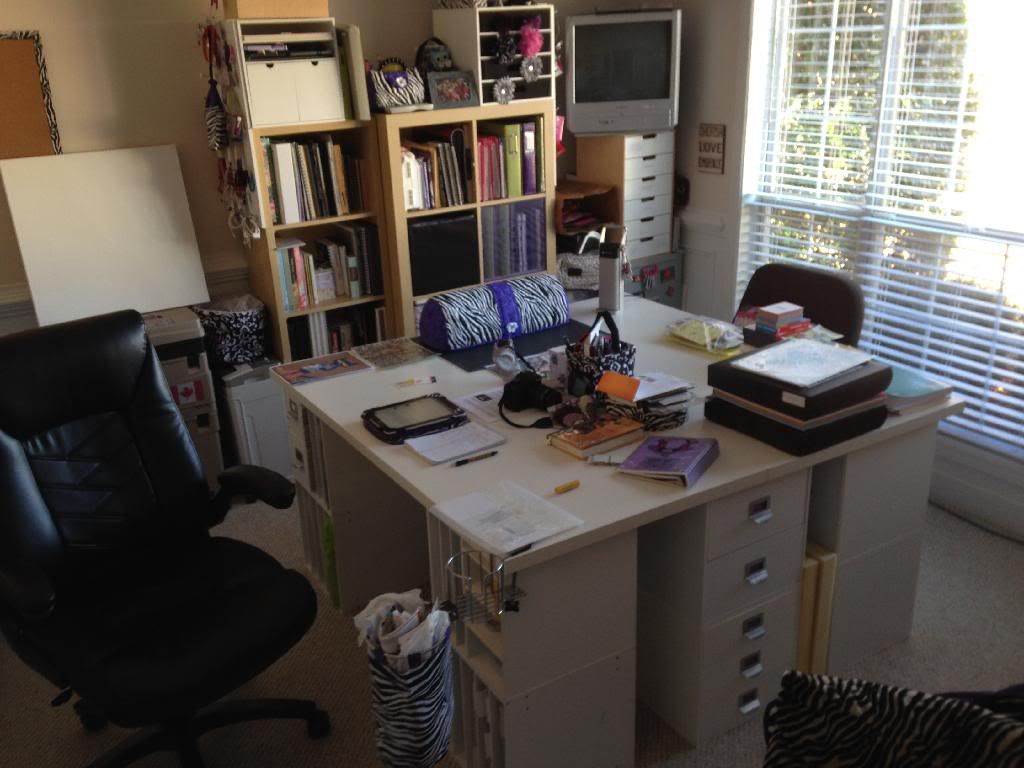
It all started with a couple Expedit Shelves and a bunch of JetMax cubes gifted to me by a good friend.  I have been organizing in my Scrap Haven for a couple of days and can almost see my table top!  ALMOST!  

I have been scrapbooking since October 2002 (about a month after we moved from Canada to Georgia). Since then, I have accumulated a lot of paper, embellishments and albums.  Some of these items are still in their plastic wrap waiting for me to use them!  
Now, you know that one of my goals from THIS post is to USE MY STASH.
Well, it all starts with knowing what you HAVE!  


So, I started with my scrapbook paper....
Some paper is loose, some is in a plastic container, some is in a little poly folder and some came in a "stack". 
I am forever pulling out the stacks to see what they have in them.  I had an "AH-HA" moment while looking through all the stacks that I had and I wanted to share it with you. Who knows, you may have a few stacks on your stash and might want to use this idea for yourself!  

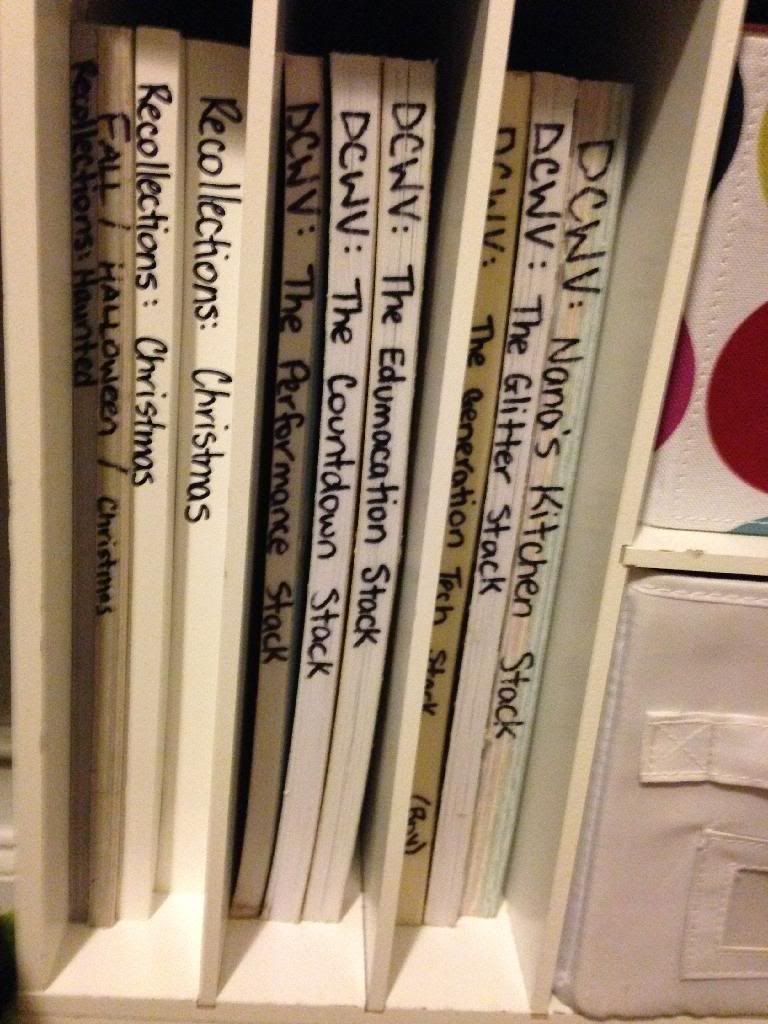
Take a sharpie marker and write on the binding of the stack:
1) Manufacturer of the Paper
2) Theme of the Paper/Name of the Paper Stack
3) Floral, Girly, Boyish, Specific Season

Example:    
Recollections: Modern Bouquet  (Floral)  
Like this:

You just did an "OH!  I never thought of that before! Ah-ha!"  See?  Ah-Ha Moment!  I did it to the first stack, then the second and kept going until each stack was labelled.  
Now, instead of grabbing each of the stacks that I have and flipping through them and wasting my scrappy time - I can eyeball them, see what each one is and keep looking for the "right" paper for the layout I am working on.  

Genius, eh?  Who'd a thunk it?  
I am going back to finishing up clearing off my scrap table.  I figure the sooner I get it cleared off, the sooner I can get to work on cutting out the titles for the two doors I am doing for the Pre-K and Kindergarten classes!  I have a LOT to cut on the cricut! Sometimes, I wish I had 2 cricuts!!!!

Wish me luck!  
Oh and for those of you wanting to see the progress so far on the Scrap Haven, here is a little sneak peek:


The birch bookshelf beside the Expedit shelf is the bookshelf/desk combo from THIS post.  Ben put it together for me and I have already filled it!  It fits perfectly in the room and holds all of my idea books, power sort boxes with all the photos I still need to scrapbook and some other projects that I am working on.  It looks great so far!  Now, to just finish the table and I can get to work on school stuff!!!!

Until Next Time,
SCRAP ON!
~Cyn~

Tuesday, January 7, 2014

Organization = A Little Bit of Happiness

I have been "AT WORK" here in the house organizing as much as I can before I head back to work.  I started by getting Ben to move the futon from the front foyer.  We moved it up to the old scrap loft - now we call it "The Loft" - and it is there for when visitors come.  It sits in the kid's play/library area.  

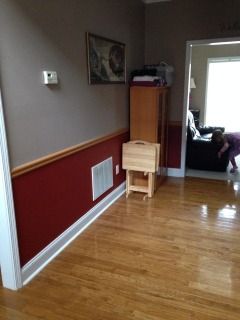
Dawn and I took a trip to "the mother ship" called IKEA! I bought an Expedit Shelf, a bookshelf/desk combo that was on clearance and a new dresser for our bedroom. 

The Expedit Shelf was for my front foyer to store some items that do not need to be stored in my Scrap Haven.  I have been working away in my Scrap Haven to start on the goals written in this post.

(Not the best picture, but it works)

I have since populated the shelf with a few of the 31 Cubes and the FINISHED scrapbooks that I had sitting on my shelves in the scrap haven.  Not all of the finished books are on the shelf, but a few to start with.  The albums that are "in process" are still in the Scrap Haven.

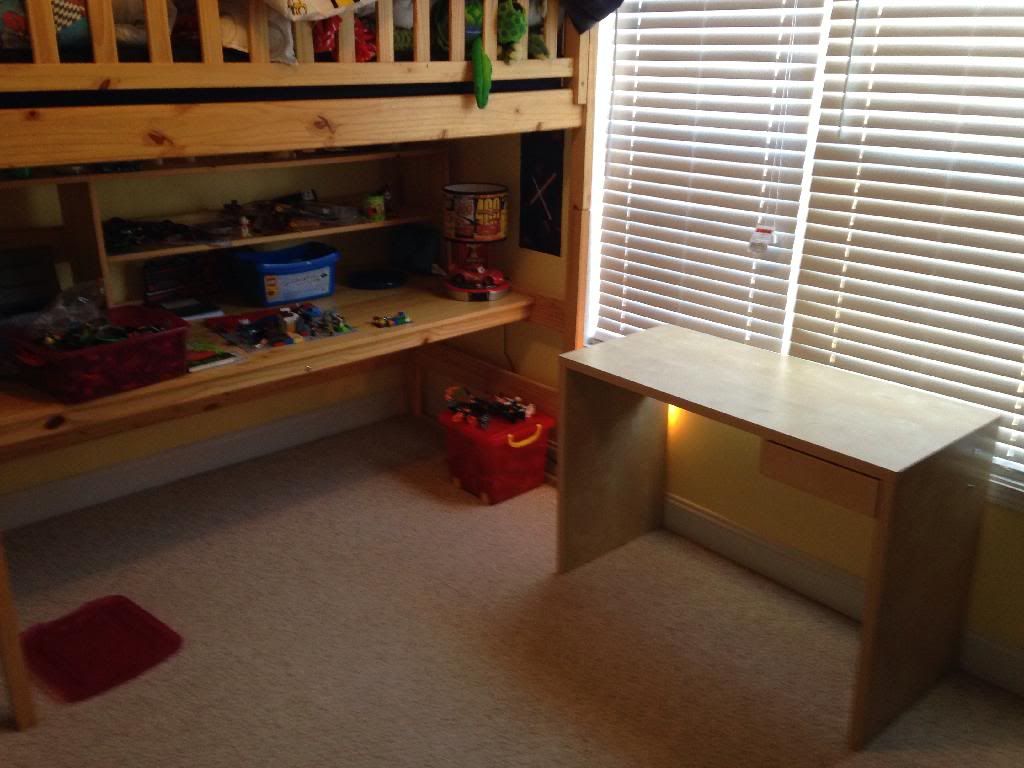
The bookshelf/desk combo was split into two rooms. The bookshelf is now in my Scrap Haven (it is the same birch colour as my Expedit Shelves in there). The desk went to Nathan's room for him to do his homework at.  I think it will be a good spot for it.  I originally wanted to sell that part of the combo, but when I went into Nathan's room and saw that his loft bed desk was covered with Lego, I thought the desk would work in there for him to use. 

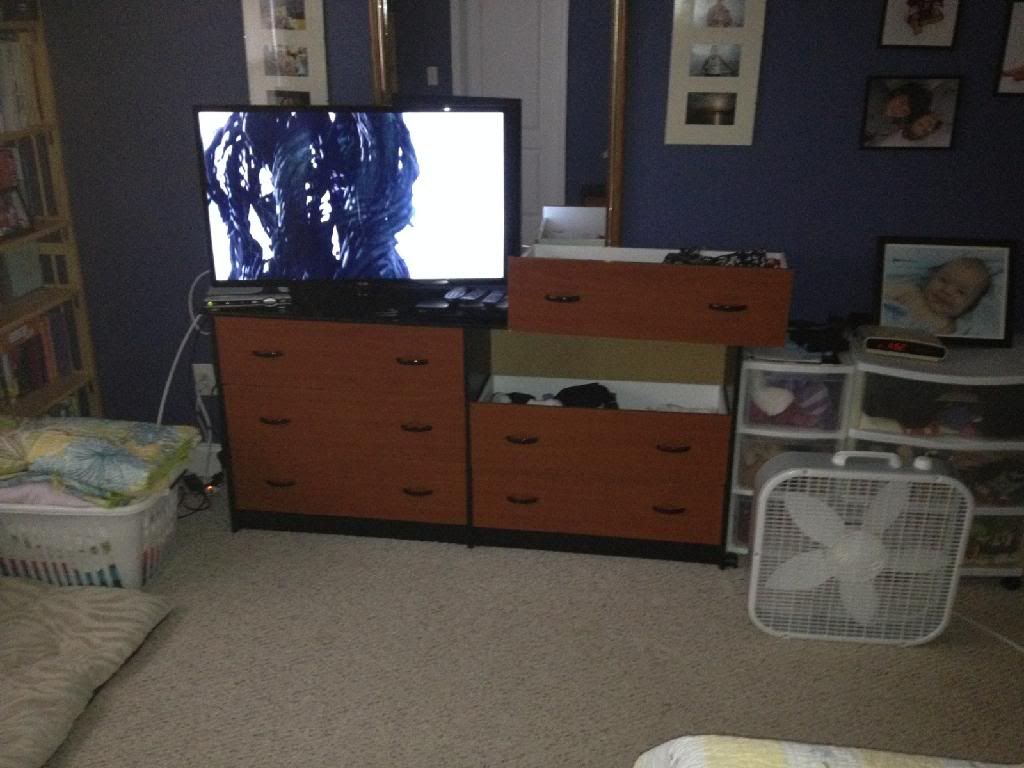
The new dresser is a replacement for our old dresser that we have had from before we got married.  My pajama drawer broke a couple years ago and when it finally wouldn't open and close anymore, I just set it on top of the dresser.  So, it was an eye-sore.  See?
(again, not the greatest picture, but it works)
Now, my dear hubby Ben took all afternoon on Sunday to put this beautiful dresser together for me and it looks FABULOUS!!!!


What a difference it makes, eh?  I am one happy chick!

So, now, I am in the Scrap Loft trying to get it organized to start working on projects.
 The bookshelf from the combo that I bought is beside the Expedit Shelf and I have put all my idea books/scrapbook sketch books and power sort boxes with all my photos on it.  


I am working to clean off the top of the scrap table and I am getting close!  
Woot!  Woot!
There you have it!  The Organization of 2014 to get READY for 2014.  
Makes this chick a happy chick!
Take care of business now, so that I can PLAY later.
Now, back to the Scrap Haven to get finished with the scrap table so that I can work on a couple of projects before school starts!

Until Next Time,
SCRAP ON!
~Cyn~

Sunday, May 13, 2012

The Scrap Loft Re-Vamp...FINALE!

I spent a lot of time last week putting together Expedit Shelves from Ikea and re-organizing my Scrap Loft.  I know, I know! I spend a lot of time re-organizing and not enough time scrapbooking! But that is about to change.  
I have a great set-up now and can really get to work on some layouts in this great area!
As I said the other day, I am on the Design Team for Jayne's Feeling Scrappy Sketchapalooza class.  So, I have a few layouts to get done ahead of time. 

Not to mention, the other layouts I need to do to finish up some of the albums that I have on the go.  That is the MAY Use Your Stash Challenge over at Scrapshare:
My CHALLENGE to you for the month of May and this weekend's celebration of National Scrapbook Day.....(if you choose to accept it) is:
  1. Go through all your albums in search of things that you need to do to FINISH the entire album to call it "COMPLETE".
  2. Make a list of each of the things that you need in order to finish the album.
  3. Get to work this month on purchasing those things and creating what you need. FORGET using your stash, this is about FINISHING THOSE SCRAPBOOKS OFF!
  4. Put the album back on the shelf, IT IS FINISHED. COMPLETE. NO QUESTIONS ASKED!
  5. Keep track of the pages you complete ONLY. Don't worry about money, don't worry about tracking the money you spent. The goal is to FINISH your albums in their entirety. Get that journaling done, get those page protectors on those pages, get the titles done! Whatever it is, in the words of Larry the Cable Guy "Git 'r Done!"

***afterall, you can't count the page as DONE until you finish everything!!!


So, the plan this week is to get in here and GET MY SCRAP ON!!!! 
Now, the pictures you have all been waiting for!!!!!
BEFORE:
The room was taken apart. I took the scrap table from the corner by the bookshelf and put it in the hallway to hold a lot of stuff while I moved stuff and threw stuff away.   
This is the wall that I re-organized and re-purposed a lot of stuff.  I also figured out that the small 4 cube Expedit would fit on TOP of the 8 cube Expedit without hitting the ceiling!  MORE STORAGE!  WOOT!
My large scrapbooking table sat in front of this bookshelf. But not anymore baby! 
AFTER:
I bought 2 Expedit Shelves at Ikea and 2 VIKA AMON table tops to sit on top of the shelves.  Jessica came over one night and we measured out the wall in front of the window and figured out that 2 Expedits lying down could fit across the entire wall and we could build my JetMax cubes up either side of the window.  It looks fabulous!  Thanks for the awesome idea Jess!!!  YOU ROCK! Oh yeah, thanks for helping me put together the last Expedit. It went together so much easier. She also helped me to put my papers back in the slots they belonged in and move around some stuff up here too!  (On a side note:  Jess pointed to the directions and it had 1 person with an "X" over it and then 2 people trying to put it together. I am not one to look at directions in the first place and YES, I did put one together on my own thankyouverymuch! Leave it to Jess to point it out though!  Love ya Jessica!!!! )
Now, I have plenty of room for me to crop, a friend to come and sit at my table and crop with me AND another 6 foot table to have 2 more friends crop with me!
Okay gals, who's coming and when?  I have an empty calendar after the 25th of May! Until then, it is end of school year stuff, book fairs, parties, etc.  You know how it is at the end of the school year!  You BLEED money for parties and teacher gifts. So, anytime after May 25th, let me know when you are coming!
For right now, I am going to go through my photos and try to scrap a few pages.  Maybe even make a couple of sketches and take this new space a test-drive!
Until Next Time,
SCRAP ON!
~Cyn~

Tuesday, May 8, 2012

IKEA!!!!

Today is the day!  Laura and I are heading to:
It is time to pick up her: 
Yep....you've got it....EXPEDIT SHELVES!!!!
I am an Ikea Family Member and this month, the Expedit Shelf above is only $59.99.  So, I may be coming home with one myself!  
Afterall, my albums when (they are finished) will need a home and THESE are perfect for CM Albums and other albums.
Last Monday, I went through all of my albums that I currently have - finished and brand new - to figure out what needed to be done to actually finish the albums.  I have 10....yes 10...that need a couple pages here and there, or page protectors, or journaling, or even pages!  So, that will be my MISSION for the month of May - TO FINISH UP the albums.
Add to that the fact that I have 12 albums still in plastic that need to be STARTED!  Yikes!  I see a lot of scrapbooking in my future...
but first....

Until Next Time,
SCRAP ON!
~Cyn~

Monday, April 23, 2012

Project Life 2012...PROGRESS!

I promised a post about progressing through the Project Life 2012 album, as well as the journaling part of Project Life.  So, here we go!

Most people find that journaling is the hardest part about scrapbooking. I think that part of the problem is that most people don't know what to say or what to include in the writing.
I personally believe that as long as the story is told, that is all that matters.  Generations to come will love to see our handwriting and read the stories that go along with the photos.  I also believe that our children will be able to "hear" our voices, long after we are gone, through our written words.  That, alone, makes me smile.  


Now, about the journaling in MY Project Life album:
I decided to do the majority of the journaling in my own handwriting.  Some people don't like their handwriting and do their journaling on the computer using a program like Word or Adobe Photoshop.  I like my handwriting.  Now, there is one instance in this album where I had to type out what I wanted to say.  Well, actually, I copied what I wrote HERE on my blog about our trip to watch our hockey team, the Montreal Canadiens, play up in North Carolina.  I wanted the entire story to be told and I used a 4x6 pocket to tell that story.  I used Microsoft Word and set the margins to 3.5 inches horizontally and 6 inches vertically.  

I got the idea for how to keep track of my journaling from my good friend, Beth McMeekin.  She keeps a log of what her kids do on a daily basis and then sends an update letter at Christmas time.  It has little things her kids say and do, as well as what the entire family has been up to throughout the year. 

So, I have a little calendar in my purse that I keep with me at all times.  Every day, I try to take a minute or two to write down what we did that day or anything funny the kids say.  This jogs my memory when I go to write my journaling for the week.  Also, since the beginning of 2012, I have been doing some weekly blogging in the form of "FILL-INS" to use for journaling throughout the year: Simple Woman's Day Book and Diary of 5.  This can also be used in your Project Life album to give a good little review of daily life.  Blogging is awesome for journaling.  Use it!!!
********************************
 Now, there are things you need to think about BEFORE you start your album:
  • Something that I figured out while I was putting the album together, was that I take a lot of VERTICAL pictures.  More than horizontal pictures, which surprised me. If you look through your photos before you even order the page protectors, you are set!  
  • Another thing I didn't think about before I started sliding the photos into their slots:  MONTHLY CARDS.  To separate the months from one another, I used the monthly stickers that came in the Core Kit to create a 4x6 MONTHLY TITLE CARD.  Had I thought about it before I started, I wouldn't have had to pull all the pictures out of the slots and start from scratch.  I think I pulled out the pictures and journaling 3 times before I got it right! Third times a charm, eh?  It was frustrating, but it is now together and looking awesome.
  • A date stamp, like they use at the library, works great for labeling the journaling cards and I also used the arrow stickers that came in the Core Kit to point to the correct photo.  I didn't have it with me at the retreat, so I had to do the dates once I got home.  Easy Peasy!
  • I used a template in PSE to create 3x4 pictures to print at CVS.  You can put 2 - 3x4 photos onto one 4x6 picture and cut the cost of printing your photos. Or you can add more photos to your pages.  FUN! 
  • These page protectors really are versatile!  By printing 2 pictures to a 4x6 photo, it allows you to use more photos to tell a story about a trip or special occasion without really messing up the flow of the album.  The pages above show you our trip.  It was a special trip and adding in a few extra pictures allowed me to tell more of that particular story. My Project Life Album is not done on a weekly basis, like most of the other people's albums.  It is a daily snapshot of our lives and I can stretch the weeks across 2  or 3 pages depending on what I need it to do.  I LOVE that about Project Life.  
  • Setting aside one day a week to go through your photos, upload to the printer (personal printer, CVS, Walgreens, etc.) and get them in their slots is not a huge time hog. It is actually easy and fast.  I have to say that even doing the pictures from 1-1-12 to 4-8-12 really only took 1 day to get organized, trimmed and journaled.  Not bad for a day's work!  If you do it in weekly chunks, it takes a couple hours.  **Naptime works great for me!**
Now, I think I have given a lot of info here about how I am working Project Life. Keep an eye out for my next post to see what I have done so far in my albums.  It will be photo intensive, but it will give you a good idea of how I am "workin' it".  

Until next time,
SCRAP ON!
~Cyn~ 


(Note: To look at all my Project Life Posts at once, you will just need to click at the bottom of this post "Project Life" and/or Project 365 and it will bring up all the posts I have written about this topic.)  

Saturday, April 21, 2012

Project Life 2012 - Getting Started!!!!

So, in January, I started to take a photo a day to do this 365+1 album.  Taking a photo a day is sometimes hard to do especially when you forget your camera! 
A couple of days, I used some backup photos that I had, but for the most part, I took a photo a day and will continue for the duration of 2012.  The Becky Higgins Project Life kits were all backordered and I had to wait until February to place my order on Amazon.    
When they finally became available again, in February, I ordered the Project Life Cobalt Core Kit, The Big Variety Pack #2 of page protectors and the Cobalt Cardstock package.  It all arrived and I posted this pic to twitter:    
Then, life and the retreat planning for Skyline got in the way of me actually getting started.  Life happens, eh?
UNTIL.....last weekend at the ScrapShare North Alabama Retreat. Here's how it all went down:

  1. Before I left for the retreat, I spent a day going through my photos from January 1, 2012 until April 8, 2012.  
  2. I copied the photos I wanted to use into a separate folder labelled 365+1. 
  3. I renamed the photos with the date they were specifically taken on or the date I wanted them for: 1-1-12, 1-2-12, 1-3-12, etc. 
  4. Then I took the pictures to CVS and printed them on matte paper.  

Now, I "cheated" on a couple of days...but it wasn't too bad.  I think I only missed 3 days from January 1st to April 8th!  Not bad if I do say so myself!  An example of "cheating" is:  January 3rd is my Mum's birthday, so I used a picture of her and I on her wedding day back in November 2011.  Since she is up in Canada and I am here, I couldn't get a picture of her on the 3rd. I used a picture of Sophie in her jammies for one of our "Jammie Days" that we have from time to time.  The photo itself was taken a couple of days before the actual jammie day.  So, it was close in time. 
So, fast forward to the retreat: 

  1. I spent the first part of the retreat putting the photos in order and figuring out which of the page protectors I needed for each week.  I realized that I take a LOT of photos vertically. Yikes!  I may have to order more of the vertical page protectors or maybe a couple packages.  
  2. Cut all my Cobalt Cardstock (which was 12x12) to 4x6 sizes.
  3. Cropped down the photos I had to fit horizontally (if they were vertical) and adhere them to the cardstock.
  4. Started slipping all the photos into the page protectors.
  5. Last but not least, JOURNAL.  (more about journaling in a separate post). 

And so it begins....my journey with Project Life.  I will be posting some more things about Project Life in the coming days, weeks and months. (Note: To look at all my Project Life Posts at once, you will just need to click at the bottom of this post "Project Life" and/or Project 365 and it will bring up all the posts I have written about this topic.)  
If you are interested in more info about Project Life, go check out Becky Higgins' Website.  She has a bar across the top of her site that allows you to see all her products, her blog, among other things. Great stuff over there, I promise!  
For those of you wondering how the retreat went?  It was RELAXING and FUN!!! Here we are "Charlie's Scrappers"....Jessica, Marta and I hamming it up at the retreat.  

Until next time,

SCRAP ON!
~Cyn~

Tuesday, April 17, 2012

Simple Woman's Day Book - Week 16


Tuesday April 17, 2012

Outside My Window....it is overcast and a little dreary!
I am thinking...the slots for Skyline are going FAST this time.  This is #10 and kind of a big deal and with only 30 slots available, the scramble begins!
I am thankful...for coffee this morning.  I didn't sleep well last night.  So, coffee is my best friend today.  It is so hard to get out of bed when the weather is overcast.  
In the kitchen...I have sinks full of dishes that haven't made it to the dishwasher yet.  I hate this...it is a huge pet peeve of mine.  But, whatever.
I am wearing...jammies.  
I am creating...a new blog post about Project Life 2012.  
I am going...to the market to get some things for a special 40th birthday scrapping party tomorrow night at Jessica's house.  Amy turns 40 today but can't get together until tomorrow night to celebrate with us.
I am wondering...how Ben's day at work is going. I hope it is a good day for him.
I am reading...a few books on my Kindle right now.  One is about WEARY MOMS and Lord knows, I need it!
I am hoping...Sophie takes a nice long nap this afternoon.
I am looking forward to...date night with Nathan this weekend. It will be just the two of us and we are both looking forward to it.  I think sometimes Nathan thinks he gets lost in the shuffle with the 2 year old and her antics/temper tantrums.  So, it is time for some mummy time, just Nathan and I!
I am learning...that my mood sets the mood for the rest of the house.  
Around the house...I have piles of laundry that need to be put away, dishes to be put in the dishwasher, phone calls to be made and a bunch of shows I have on the DVR that need to be watched.  
I am pondering...the video on YouTube that Becky Higgins did about organizing her children's school work.  It is 29 minutes long and it is pure genius!!  Check out the video:
  
A favourite quote for today....
One of my favourite things...my DSLR Camera - Canon Rebel T2i
A peek into my day....Mowgli spends most of his day on our bed.  He is 14 years old and it was his birthday yesterday (the 16th).  


************************************
If you are interested in joining in with the Woman's Day Book Entries, click the link below:
http://thesimplewomansdaybook.blogspot.com/

Until Next week, SCRAP ON!!!

~Cyn~

Monday, February 27, 2012

Simple Woman's Day Book - Week 9


Monday February 27, 2012

Outside My Window....it is overcast and mild.  Interesting winter weather for sure!  The dogs are playing in the backyard as I sit here writing.
I am thinking...this week will be interesting with Ben gone to Michigan for training.  
I am thankful...Ben's company has as much faith in him as I do for sending him on training (3 trips already planned for 2012) and investing in him.  He really IS worth it.  
In the kitchen...I have coffee brewing and a little girl playing with the farm fridge magnets. 
I am wearing...comfy clothes.  I don't plan to go anywhere this week unless I absolutely have to!  
I am creating...a power layout for the Skyline Retreat in 2 weeks and 3 days! I am pumped that it is going so well and hope that I can knock out some serious scrapbooking layouts while I am at the retreat!
I am going...crazy!!!  No, seriously, I am not going anywhere.  Just trying to stick around the house and get some things done while Ben is away.  Going through closets, getting rid of things I haven't touched in over a year and making a pile for a yard sale.    
I am wondering...how Nathan is doing at school today. After a whole week off for winter break last week, I am sure it will be hard for him to settle down and work.  
I am reading...all the magazines that are on my bedside table right now.  I have about 15 scrapbooking magazines that I need to look through and a few of the All You magazines with pages dog-eared.
I am hoping..."Single Mummy Week" goes smoothly.  
I am looking forward to...Tuesday night when Marta comes for dinner and to hang with me and the kidlets.      
I am learning...patience, patience and more patience.      
Around the house...the dogs have been put in their crate for stealing food from Sophie and Sophie is in her room reading books.  I am sitting in the scraploft looking at photos.  
I am pondering...what to do for dinner tonight....
A favourite quote for today....
"it is better to be content with what little you have. Otherwise, you will always be struggling for more, and that is like chasing the wind."
Ecclesiastes 4:6 NCV

One of my favourite things...my bathtub.  It is my "go to" when I need to relax.  The HOTTEST bath water that I can stand and a book to read while I soak away my troubles....
A peek into my day....


************************************
If you are interested in joining in with the Woman's Day Book Entries, click the link below:
http://thesimplewomansdaybook.blogspot.com/


Until Next week, SCRAP ON!!!
~Cyn~

Tuesday, February 14, 2012

Scrap Nook Re-Organization...

BEFORE:  This is Dawn's little scrap nook in her master bedroom.
This is the area beside the scrap nook and we decided to organize it a little better and leave it for a little longer.
We moved the bookcase to the edge of the wall and then put the little Iris organizer in the corner.  The Creative Memories bag sits on top because the pages and protectors are in there and we want to keep it out of her little man's reach when he is in their room.  I cleared off all the papers and bins on her desk, moved the albums to an 8-cube Expedit shelf from Ikea.  It really opened up the shelves on her bookcase to put things up high out of her toddler's reach.  The finishing touch will be her papers sorted into ROYGBIV, White, Black, Brown and Grey piles to put in a paper organizer for easy access on her bookcase.  

It looks AWESOME!!!

Until next time, SCRAP ON!
~Cyn~